Of all the various parts that go into building a mandolin, the top has the most significant influence on tone quality. If you build it too stiff, the instrument will sound tinny, with poor projection. If you build it too light, it won’t have the strength to withstand 50+ pounds of down-pressure from the strings, and it may collapse! Somewhere in between is a sweet spot where the top is strong enough to last for many years but vibrates readily to produce a pleasing tone at a high volume.

The search for this ideal begins with selecting the best possible wood for the job (see my October 21 post). Spruce species seem to provide the best combination of light density and stiffness, so that’s my first choice. Next, I begin carving the rough pieces to bring them to the right shape and thickness. For my current build, I have a luthier friend, Kris Young who agreed to do the rough carving using a computer-driven milling machine (CNC) using patterns that I developed over the past 30 years based on old Gibson mandolins.
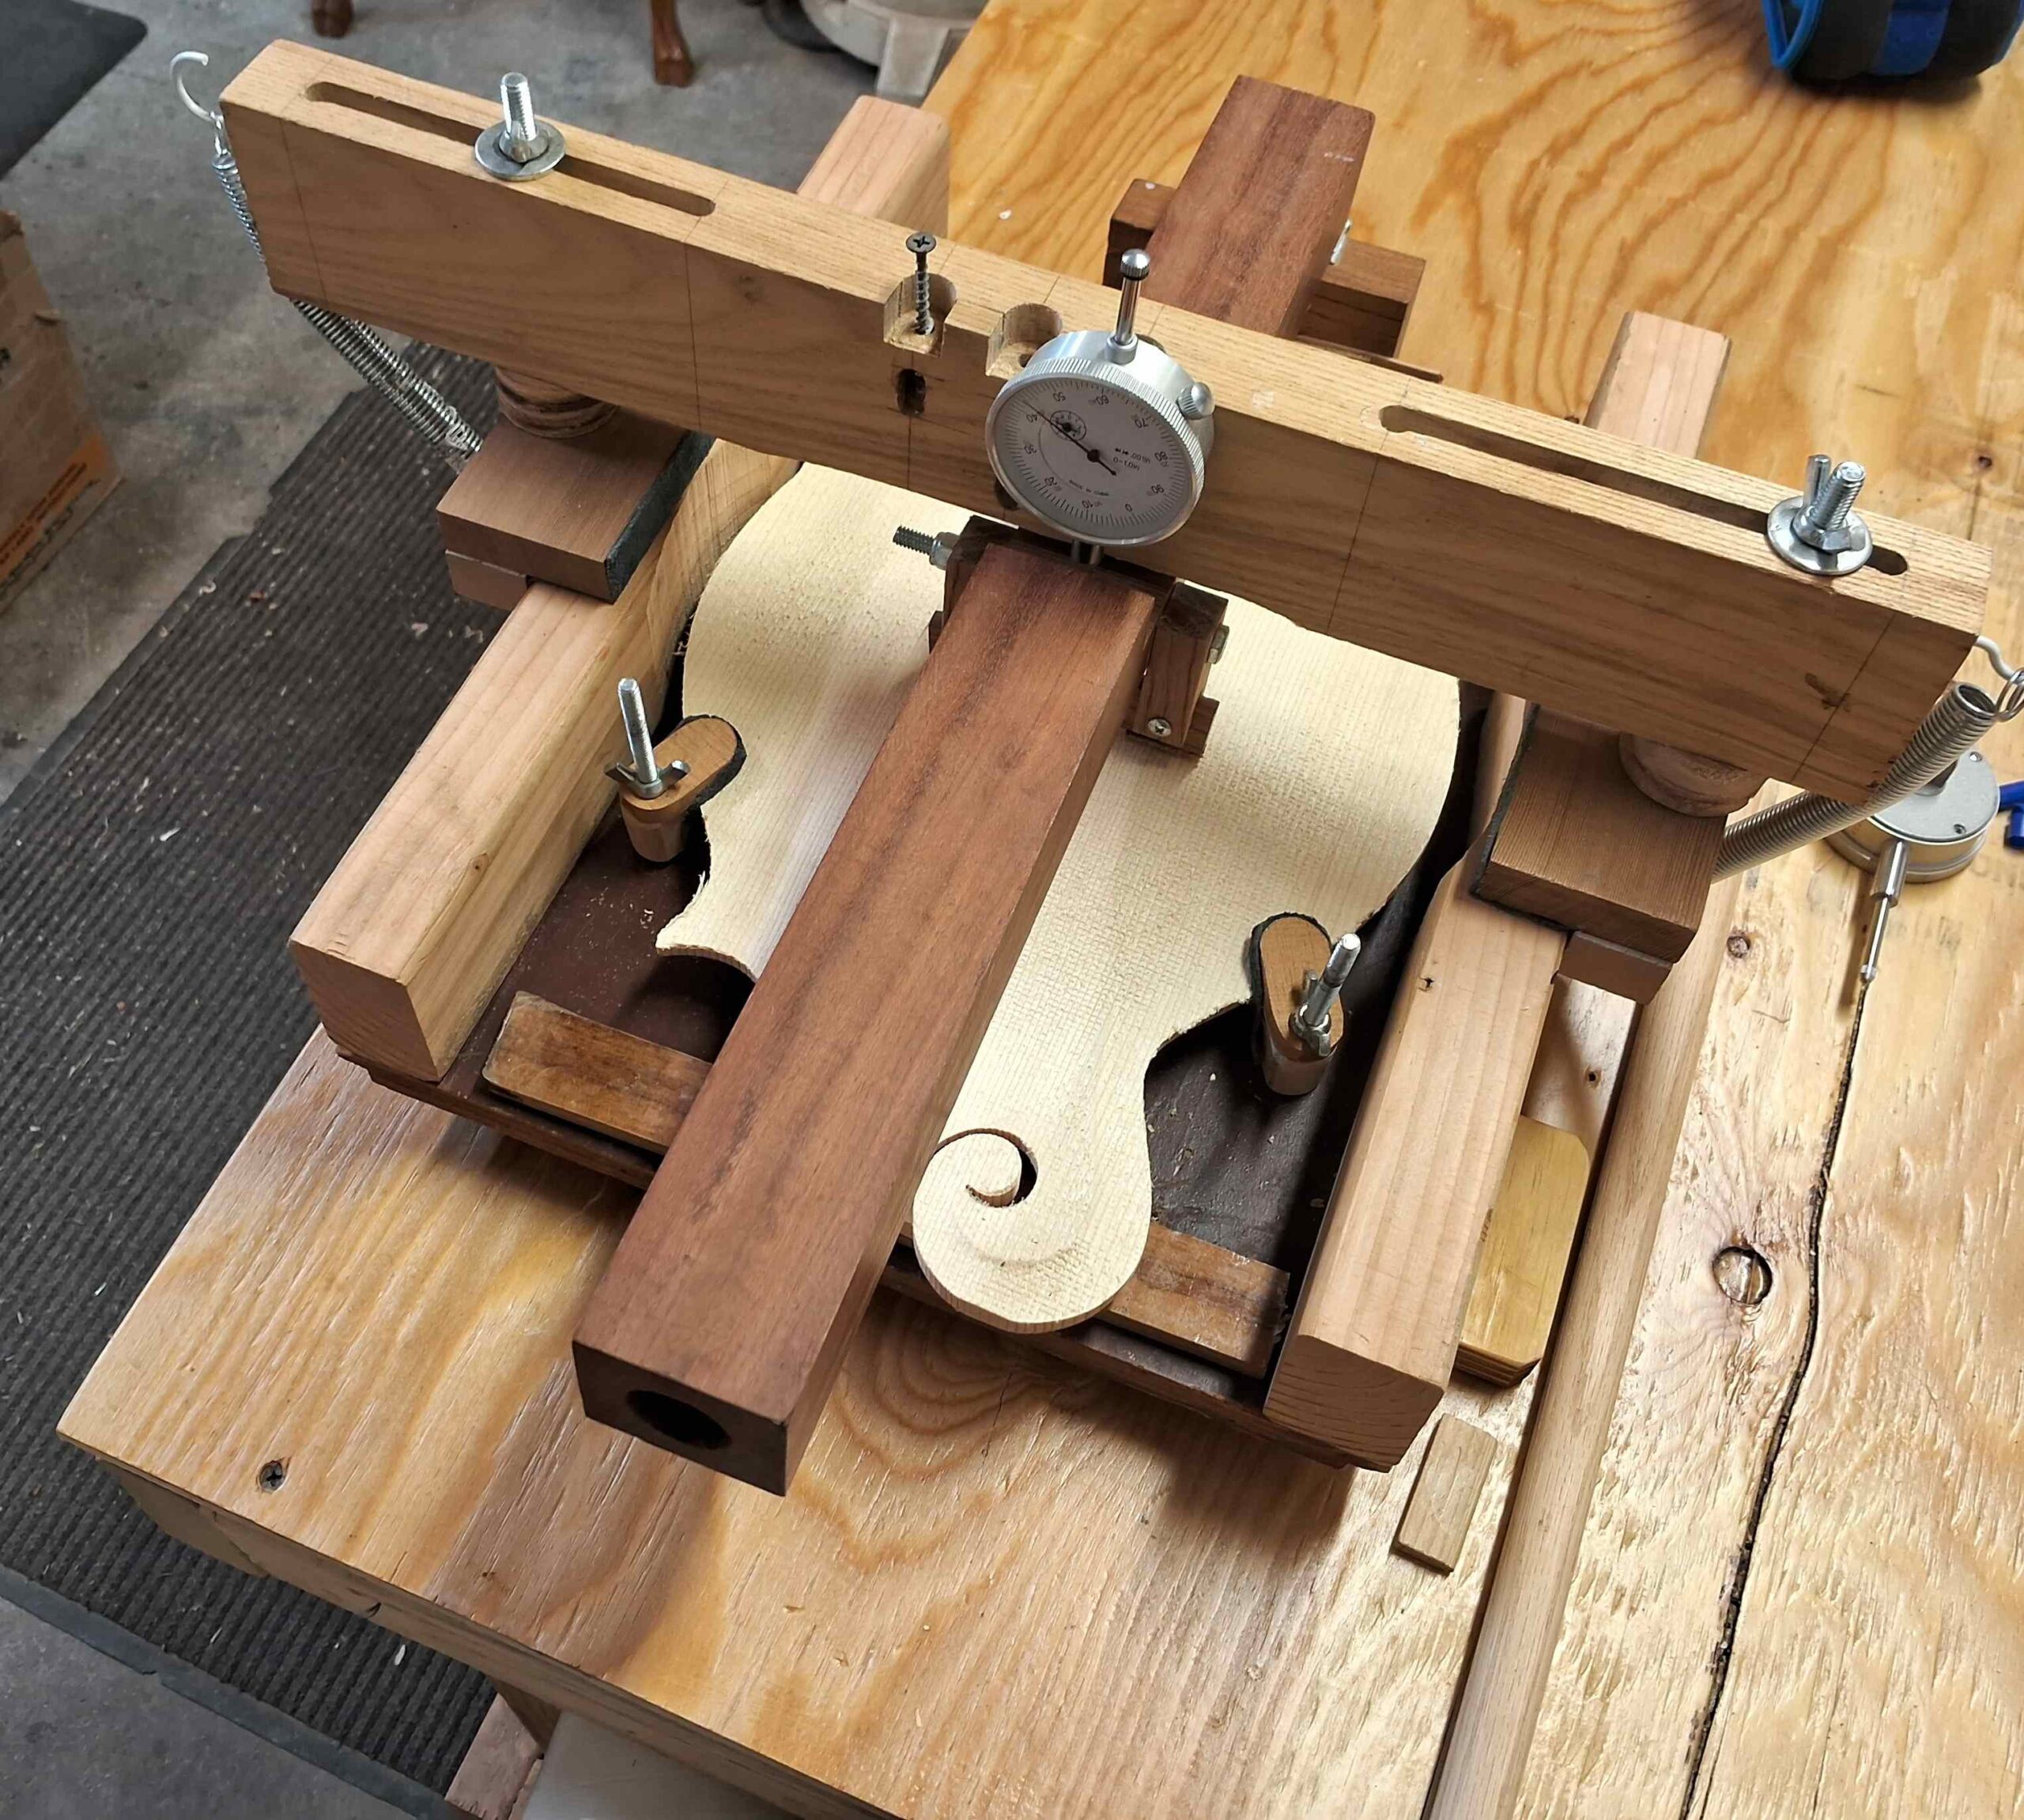
The plates come from the CNC milled 1-2 mm thicker than my targets. So thereafter, I begin a process of thinning with small planes and sanders, testing with a 25 lb. weight on my deflection jig, then repeating until the plate begins to flex and ring like a musical instrument instead of a chunk of wood!

Every piece, even when cut from the same tree, is different in density and stiffness, so they need to be individually thinned to produce instruments with consistent tone and durability.

The final thinning and tuning will happen after the plate is glued to the sides and the instrument is strung up to pitch. Even at that stage, thinning portions of the top or back can have significant impact on the tone. Stay tuned for the rest of the story!!